

Table of contents
Introduction
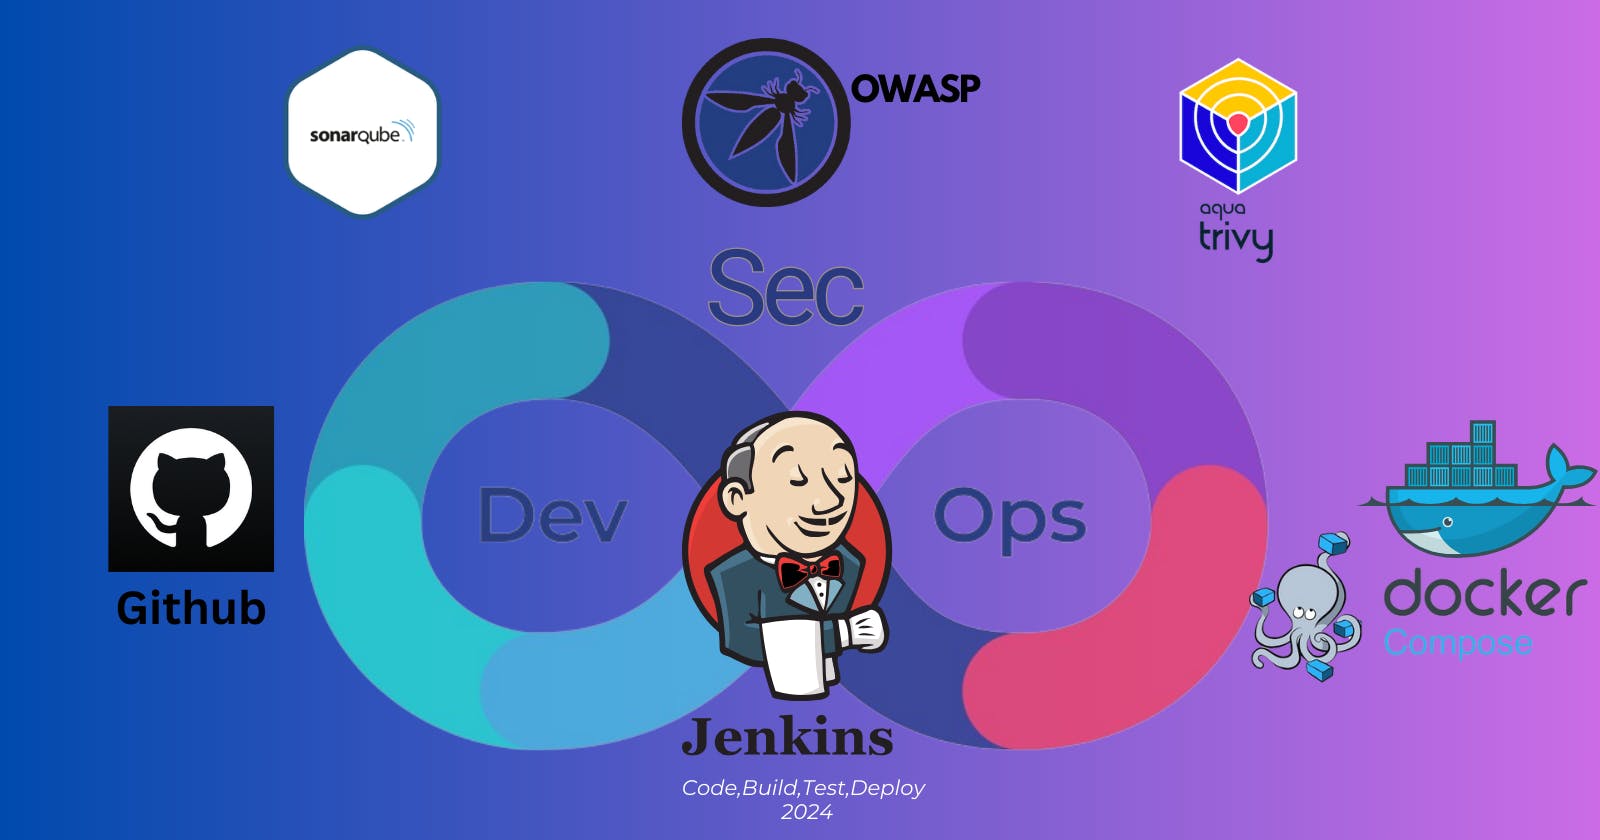
In today's fast-paced software development landscape, ensuring the security and efficiency of our code deployment processes is paramount. The integration of DevOps and security practices, known as DevSecOps, is gaining prominence as organizations strive to streamline their workflows while maintaining robust security measures. In this guide, we will walk through the implementation of an end-to-end DevSecOps pipeline, covering essential tools and practices.
Tools Covered:
Linux: The operating system of choice for hosting our DevOps tools and services.
Git and GitHub: Version control system for managing code repositories and collaboration.
Docker: Containerization platform for packaging applications and dependencies.
Docker-compose: Tool for defining and running multi-container Docker applications.
Jenkins CI/CD: Automation server for orchestrating the build, test, and deployment processes.
SonarQube: Continuous code quality inspection tool for identifying and addressing technical debt and vulnerabilities.
Trivy: Vulnerability scanner for container images, ensuring their security before deployment.
Pre-requisites:
To implement this project, ensure you have:
An AWS EC2 instance (Ubuntu) with specifications as specified.
Jenkins installed on your instance.
Docker and docker-compose installed.
Trivy installed.
SonarQube Server running as a Docker container.
Steps for Jenkins CI/CD:
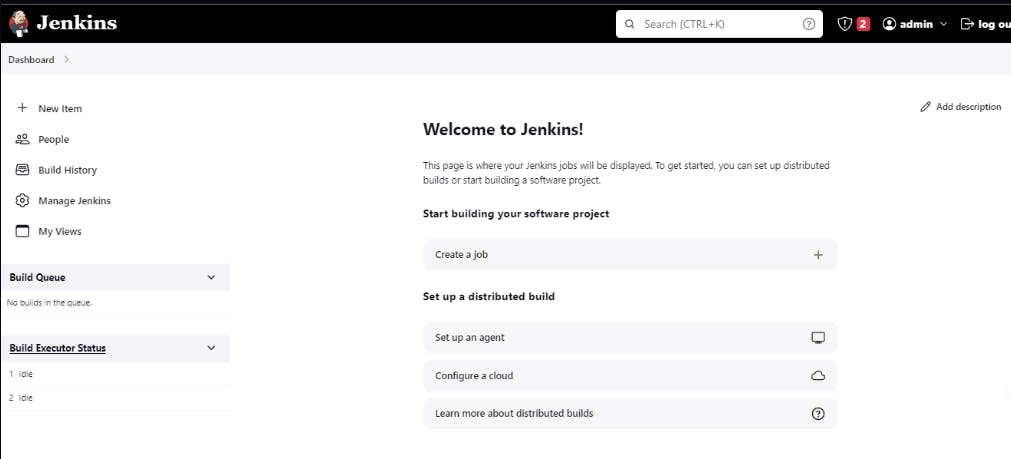
Access Jenkins UI and Setup Jenkins:
Navigate to the Jenkins UI and set up your Jenkins instance according to your requirements.
Plugins Installation:
Go to Manage Jenkins, click on Plugins and install all the plugins listed below, we will require for other tools integration:
SonarQube Scanner (Version2.16.1)
Sonar Quality Gates (Version1.3.1)
OWASP Dependency-Check (Version5.4.3)
Docker (Version1.5)
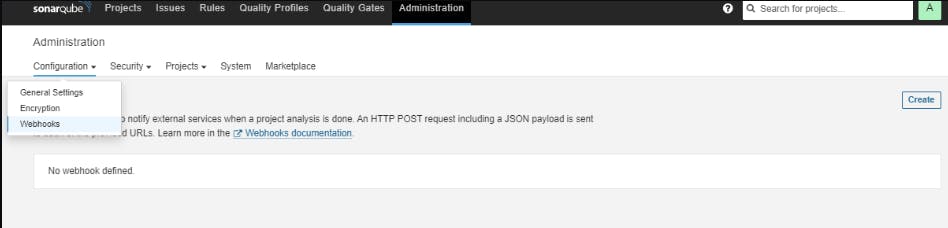
Create SonarQube Token and Webhook:
Click on Administration tab, then Security , then Users and create Token.
Create a webhook to notify Jenkins that Quality gates scanning is done. (We will need this step later)
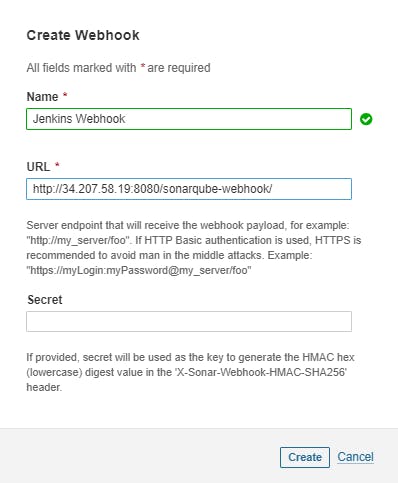
- Go to SonarQube Server, then Administration , then Configuration and click on Webhook , add webhook in below Format:
http://<jenkins_url>:8080/sonarqube-webhook/
Example:
http://34.207.58.19:8080/sonarqube-webhook/
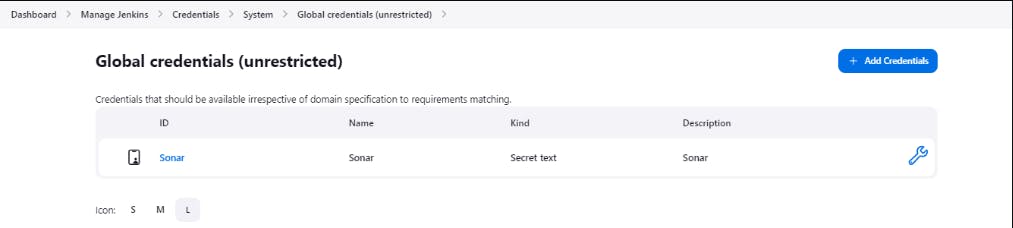
Go to Jenkins UI Manage Jenkins , then Credentials and add SonarQube Credentials.
Integrate SonarQube with Jenkins:
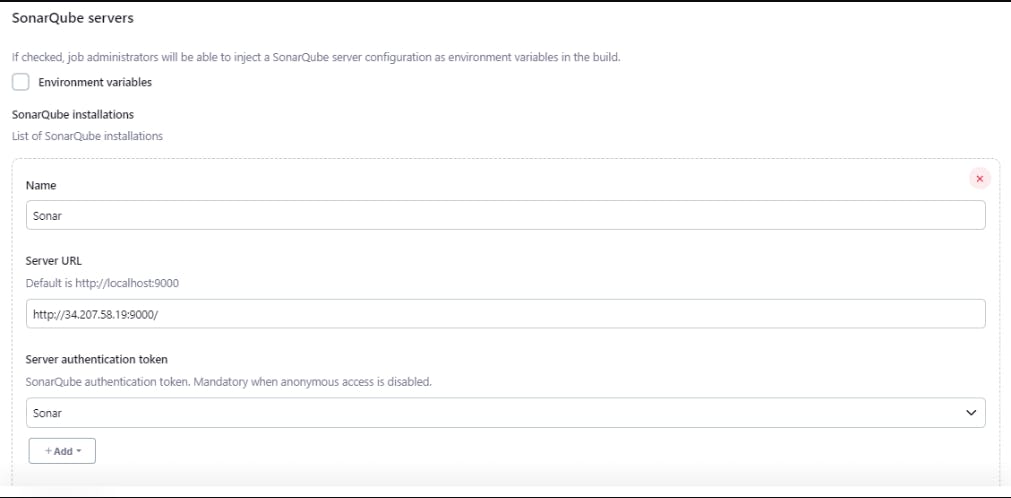
It's time to integrate SonarQube Server with Jenkins, go to Manage Jenkins , then System and look for SonarQube Servers and add SonarQube.
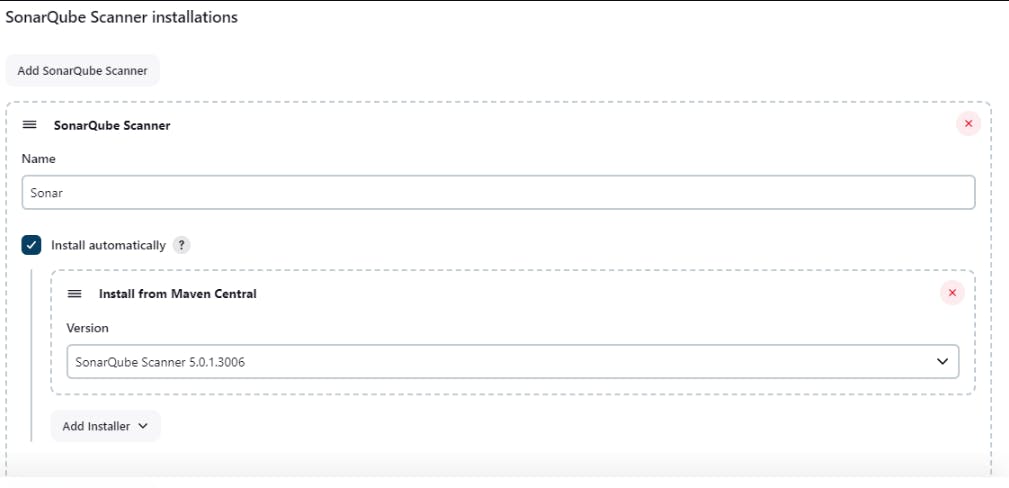
Go to Manage jenkins, then Tools , Look for SonarQube Scanner Installations and add SonarQube Scanner
Integrate OWASP Dependency-Check and Trivy:
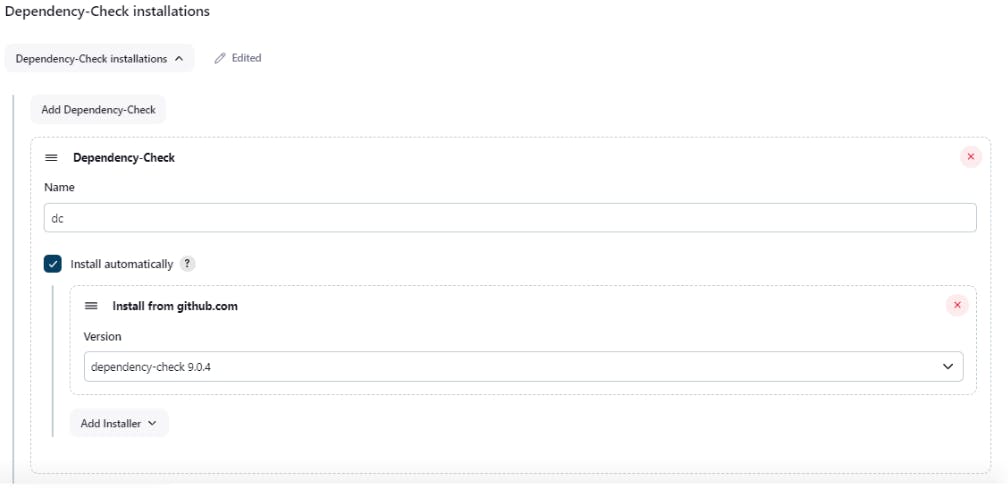
Integrate QWASP with Jenkins, go to Manage Jenkins , then tools , look for Dependency-Check installations and add Dependency-Check.
Now, It's time to create a CI/CD pipeline in Jenkins:
Click on New Item and give it a name and select Pipeline.
Select GitHub Project and paste your GitHub repository link.
Scroll down and in Pipeline section select Pipeline script from SCM, because our Jenkinsfile is present on GitHub.Run the Pipeline:
- Trigger the pipeline and observe the automated build, test, and deployment processes in action.
You Can directly create the pipeline on Jenkins using script
pipeline{ agent any environment{ SONAR_HOME= tool "Sonar" } stages{ stage("Clone Code from GitHub"){ steps{ git url: "https://github.com/krishnaacharyaa/wanderlust.git", branch: "devops" } } stage("SonarQube Quality Analysis"){ steps{ withSonarQubeEnv("Sonar"){ sh "$SONAR_HOME/bin/sonar-scanner -Dsonar.projectName=wanderlust -Dsonar.projectKey=wanderlust" } } } stage("OWASP Dependency Check"){ steps{ dependencyCheck additionalArguments: '--scan ./', odcInstallation: 'dc' dependencyCheckPublisher pattern: '**/dependency-check-report.xml' } } stage("Sonar Quality Gate Scan"){ steps{ timeout(time: 2, unit: "MINUTES"){ waitForQualityGate abortPipeline: false } } } stage("Trivy File System Scan"){ steps{ sh "trivy fs --format table -o trivy-fs-report.html ." } } stage("Deploy using Docker compose"){ steps{ sh "docker-compose up -d" } } } }pipeline: This defines the start of our Jenkins pipeline. It encapsulates the entire workflow.
agent any: This specifies that the pipeline can run on any available agent.
environment: Here, we define an environment variable
SONAR_HOMEto specify the SonarQube installation directory using the Jenkins tool configuration.stages: These are the different stages of our pipeline, representing the distinct steps in our deployment process.
stage("Clone Code from GitHub"): This stage clones the code repository from GitHub, specifically the branch named "devops".
stage("SonarQube Quality Analysis"): This stage performs the SonarQube analysis on the cloned code. It uses the SonarQube scanner to analyze the codebase and generate quality reports.
stage("OWASP Dependency Check"): Here, we perform an OWASP Dependency-Check to scan for any known vulnerabilities in the project's dependencies.
stage("Sonar Quality Gate Scan"): This stage waits for the SonarQube Quality Gate to pass before proceeding. If the quality gate criteria are not met within the specified time, the pipeline may either continue or abort based on the configuration.
stage("Trivy File System Scan"): Trivy is used here to scan the file system for vulnerabilities in the Docker images.
stage("Deploy using Docker compose"): Finally, this stage deploys the application using Docker Compose, ensuring that the containers are up and running.
By structuring our pipeline into stages, we can visualize and monitor the progress of each step, enabling efficient and automated deployment processes.
By following these steps, you have established a robust DevSecOps pipeline using Jenkins and integrated essential tools like SonarQube, OWASP Dependency-Check, and Trivy to ensure code quality and security at every stage of the deployment lifecycle.
Implementing DevSecOps practices not only enhances the efficiency of your development processes but also strengthens your application's security posture, enabling you to deliver reliable and secure software to your users.
Stay tuned for more insights and best practices in DevOps and DevSecOps as we continue to explore innovative approaches to software development and deployment. Happy coding!